
On this page
To bbq ribs on a gas grill, set the grill up for indirect cooking at a steady 250°F to 275°F, remove the membrane, season the ribs simply, cook them low and slow with the lid closed away from direct flames, and brush on barbecue sauce only during the last 15 to 20 minutes. Whether you're grilling baby back ribs for a family dinner or St. Louis style ribs for a weekend cookout, those basics are what turn a gas grill into a reliable rib cooker.
After years of backyard grilling and product testing, we've found that understanding the meat, controlling temperature, and making small adjustments throughout the cook have a much bigger impact than any single technique. For backyard cooks and outdoor grilling enthusiasts who want better ribs without buying a smoker or relying on guesswork, this guide breaks down the full process: choosing the right cut, setting up your gas grill for indirect heat, removing the membrane, seasoning, wrapping or not wrapping, knowing when the ribs are done, slicing them cleanly, and avoiding the most common heat and sauce mistakes. We've also included recommendations for Monument Grills products and related guides that can help you get even better results.
Great Ribs Aren't About a Secret Recipe
Ask ten barbecue enthusiasts how they cook ribs and you'll probably hear ten different methods.
Some swear by 3-2-1. Others never wrap. Some cook strictly by temperature, while others rely on how the meat bends when lifted.
After cooking hundreds of racks on Monument Grills, we've learned something simple:
Great ribs don't come from following one famous method—they come from understanding what the meat needs.
Once you understand how heat, moisture, fat, and time work together, you can make incredible ribs on almost any gas grill.
If you're cooking on a Monument Grill, this guide will help you get there.
Recommended Grill
If you're looking for consistent low-and-slow performance, our Denali Series Smart Grill makes maintaining steady temperatures much easier.
1. Start with the Right Rack
The biggest improvement most backyard cooks can make actually happens before lighting the grill.
Baby Back Ribs
- Leaner
- Cook faster
- More tender
- Great for weeknight grilling
St. Louis Style Ribs
- Meatier
- More fat
- Better bark
- More forgiving
St. Louis-style ribs are trimmed from pork spareribs, the larger, meatier cut.
Neither is "better."
If you're cooking for friends and want that classic BBQ bite, St. Louis ribs are hard to beat.
Baby Back vs. St. Louis Ribs: Quick Reference
| What to know | Baby back ribs | St. Louis style ribs |
|---|---|---|
| The cut | Leaner and more tender | Trimmed from pork spareribs; meatier, with more fat |
| Grill temperature | 250–275°F, indirect heat, lid closed | |
| Cook time | Shorter; baby backs cook faster | Longer; the meatier rack takes more time but is more forgiving |
| When to wrap (optional) | Once the bark looks right, often after two or three hours | |
| Sauce | During the final 15–20 minutes, one thin coat at a time | |
| Done when | The rack bends easily with small surface cracks, the meat pulls back ¼–½ inch from the bone ends, and a probe slides between the bones with little resistance (about 190–203°F) | |
| Rest before slicing | 10–15 minutes | |
| Best for | Weeknight grilling | Classic BBQ bite and better bark |
2. Don't Chase Time. Chase Temperature.
One mistake we made years ago was treating every cook like a timer.
"Three hours wrapped."
"Exactly five hours."
Real barbecue doesn't work that way.
Every rack is different.
Instead, focus on maintaining a grill temperature between:
250°F–275°F
For ribs, that's a low temperature range that cooks gently and evenly.
That range gives collagen and connective tissue enough time to slowly break down while keeping the meat juicy.
If your grill constantly swings between 225°F and 325°F, the ribs will tell you.
They're surprisingly honest.
3. Gas Grills Can Make Excellent Ribs

A common myth is that only smokers make great ribs.
Not true.
A quality gas grill with indirect heat is capable of producing fantastic barbecue.
Here's how we normally set ours up, and it works the same on a propane grill or a natural gas grill.
- Turn on only one or two burners.
- Keep the ribs on the cool side of the grill.
- Close the lid.
- Add a smoker box or foil packet with wood chips if you'd like extra smoke flavor, then let the ribs cook over the grill grates away from the flame.
The goal isn't direct heat.
It's creating a gentle convection oven inside your grill.
4. Remove the Membrane (Yes, It Matters)

Some cooks skip this.
We don't recommend it.
The thin membrane on the back of the ribs becomes chewy and blocks seasoning from reaching the meat.
Use a butter knife to loosen one corner.
Grab it with a paper towel.
Pull slowly.
Done.
If needed, trim off excess fat before seasoning.
It takes less than a minute and noticeably improves texture.
5. Season Simply

You don't need twenty ingredients; this rub relies on simple ingredients.
Pat the ribs dry first, then use a very light coat of yellow mustard as a binder before seasoning.
One of our favorite everyday rubs is simply; apply it generously for even coverage:
- Kosher salt
- Black pepper
- Smoked Paprika
- Garlic powder
- Onion powder
- Brown sugar
Brown sugar adds sweetness and helps with caramelization.
That's enough.
The pork should still taste like pork.
Freshly ground spices and an even coating make a bigger difference than a long ingredient list, and letting the seasoned ribs sit a bit longer can build more flavor. A balanced rib rub improves flavor and supports a better finished texture. If you're building your barbecue toolkit, these must-have gas grill accessories can help make prep and cooking easier.
6. The Biggest Mistake: Too Much Heat

If your ribs are burning on the outside before they're tender inside, the problem usually isn't the recipe.
It's heat.
We see this all the time.
People open the grill.
See the temperature drop.
Turn every burner to High.
Five minutes later...
The sugar in the rub starts burning.
The edges dry out.
The ribs never recover.
Instead, trust the process.
Keep the lid closed.
Small adjustments are almost always better than big ones.
7. Should You Wrap Your Ribs?
The answer depends on what kind of ribs you enjoy.
Wrap if you want:
- Softer texture
- Faster cooking
- Extra moisture
Skip wrapping if you want:
- Better bark
- Firmer bite
- More smoke flavor
There's no wrong answer.
Lately we've been wrapping only when the bark looks exactly how we want it.
Sometimes that's after two hours.
Sometimes it's three.
The ribs decide.
8. Sauce at the End—Always

One of the easiest ways to ruin great ribs is adding bbq sauce too early.
Most barbecue sauces contain sugar.
Sugar burns quickly.
Instead:
Brush on your favorite bbq sauce during the final 15–20 minutes.
Apply one thin coat.
Let it set.
Add more sauce in a second light coat if desired.
You'll get a glossy finish instead of burnt sugar. In that brief window, the sauce caramelizes without scorching.
9. How Do You Know They're Done?
Forget exact cooking time.
Instead, watch for these signs.
The Bend Test
Pick up the rack with tongs.
It should bend easily and small cracks should appear on the surface.
Bone Pullback
The meat should shrink back about ¼–½ inch from the ends of the bones.
Probe Test
A meat thermometer can help you check internal temperature, but tenderness still matters most: the probe or skewer should slide between the bones with very little resistance.
Those three indicators are much more reliable than watching the clock.
10. Slice Meat-Side Down for Cleaner Cuts

After spending hours cooking ribs, don't rush the final step.
When it's time to slice, turn the rack meat-side down on your cutting board. The bones become much easier to see, making it simpler to cut cleanly between them without tearing the meat or damaging the bark.
Use a sharp chef's knife or slicing knife, and cut one rib at a time with smooth, even strokes.
It may seem like a small detail, but it's one of those finishing touches that makes your ribs look just as good as they taste. Serve them hot right after slicing for the best texture.
Our Favorite Gas Grill Rib Workflow

This is the process we use most often for making ribs on a gas grill for backyard cooks.
- Remove membrane.
- Apply dry rub.
- Let ribs rest 30–60 minutes.
- Preheat grill for indirect cooking (250–275°F).
- Cook unwrapped, with the lid closed, until bark develops.
- Wrap in foil only if desired.
- Sauce during the final 15–20 minutes, then serve with extra BBQ sauce on the side if desired.
- Rest 10–15 minutes before slicing.
Simple. Repeatable. Reliable.
How to BBQ Ribs on a Gas Grill Faster
Ribs on a gas grill are still a low-and-slow cook measured in hours, not minutes. If you're short on time, these choices shorten the cook without burning the outside:
- Choose baby back ribs. They're leaner and cook faster than St. Louis style ribs.
- Preheat while you prep. Set the grill up for indirect heat while you remove the membrane and apply the rub. If time is tight, you can cut the 30–60 minute rest after seasoning short and give up a little of the flavor it builds.
- Hold the top of the range. Keep the grill closer to 275°F than 250°F. Going hotter, or turning every burner to High, is how the rub burns and the edges dry out.
- Wrap once the bark is set. Wrapping in heavy-duty foil speeds up cooking and keeps the ribs moist; the trade-off is a softer bark.
- Keep the lid closed. Every time you open it, the temperature drops and the grill has to recover.
Whatever shortcuts you take, judge doneness the same way: the bend test, bone pullback, and a probe that slides in easily.
Equipment That Makes the Biggest Difference
You don't need dozens of accessories.
These are the tools we actually reach for.
- Instant-read meat thermometer
- Grill thermometer
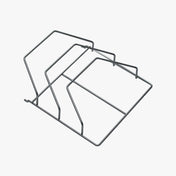
- Rib rack (when cooking multiple slabs)
- Smoker box for wood chips
- Heavy-duty aluminum foil
A small bowl is also handy for mixing the dry rub before the ribs go on. If you make ribs often, a recipe card or printable checklist can make repeat cooks easier.
How to Cook Better Ribs: Frequently Asked Questions
Can you cook ribs entirely on a gas grill?
Absolutely. Indirect heat allows a gas grill to cook ribs low and slow with excellent results. Adding wood chips in a smoker box can provide additional smoke flavor. Using two-zone cooking on a gas grill prevents ribs from cooking directly over high flames. If your grill has a rotisserie kit, you can also let the spit do the turning, as in our rotisserie baby back ribs recipe.
Should ribs fall off the bone?
Not necessarily.
Competition barbecue usually aims for a clean bite where the meat stays attached until bitten.
Fall-off-the-bone ribs are often slightly overcooked—though many backyard cooks still prefer tender ribs that are nearly fall-off-the-bone.
What's the best temperature for ribs?
We recommend maintaining your grill between 250°F and 275°F for most pork ribs.
When should I add barbecue sauce?
During the last 15–20 minutes of cooking to prevent the sugars from burning, and if you want a quick char, watch closely so the sauce doesn't burn.
Do I need a smoker to make great ribs?
No. Ribs should be cooked indirectly on a gas grill to improve tenderness. Check rib doneness at 190-203°F for tenderness.
A quality gas grill with indirect heat can produce outstanding ribs.
The key is temperature control—not expensive equipment.
Final Thoughts
Every great pitmaster eventually realizes something.
There isn't one perfect rib recipe.
There are only better decisions.
Steady heat.
Simple seasoning.
Patience.
A little practice.
Do those four things consistently, and every rack gets better than the last.
That's what backyard barbecue is all about.
They're the product of good decisions made throughout the cook, from choosing the right rack and maintaining steady temperatures to slicing the finished ribs correctly.
Master these techniques, and your next rack won't feel like guesswork. It'll be the kind of barbecue your family and friends ask you to make again.
If you're looking for more recipes, grilling techniques, and product recommendations, explore the grilling tips for more backyard cooking inspiration.




Join the conversation
Share Your Thoughts
Have a question, a variation, or a result worth sharing? Add it to the conversation.