
On this page
Gas grilling for beginners comes down to a handful of steps you can learn in a single afternoon. This post walks you through lighting your first fire, setting up heat zones, hitting safe temperatures, and keeping your grill in shape long after the fun fades.
It starts where a new grill owner actually starts: with an assembled grill and a full propane tank. If your grill is still in the box, or you're deciding where it should live, begin with our gas grill installation and setup guide, then come back here for the first light.
How to use a gas grill for the first time: with the grill assembled outdoors, connect the propane tank with every burner knob off, check the connection for leaks with soapy water, and run a burn-off on high before your first cook. Then light with the lid open, preheat with the lid closed for about 15 minutes, cook something easy like burgers over direct heat, and shut down by turning every burner off and closing the tank valve.
If you ever smell gas, don't light the grill. Turn the gas off only if you can do it safely and move away.
Quick-Start: Your First Time Using a Gas Grill
You can go from an unopened propane tank to cooked food in under 15 minutes. No charcoal, no lighter fluid, no guesswork—just a clear sequence that keeps you safe while you learn.
The first session takes a little longer than that, because a brand-new grill also needs a leak check and a burn-off. After that first day, you'll be down to the short routine: open the tank, light, preheat, cook.
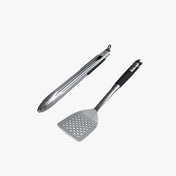
Bring outside before you start: tongs, spatula, clean plate for cooked food, oil, salt, pepper, instant-read thermometer, paper towels.
Safety: Keep kids and pets well back. Never leave a lit grill unattended to prevent dangerous situations. Know where your tank shutoff is so you can reach it quickly. Monument Grills models with smart displays or app-connected probes can send temperature alerts to your phone—helpful for first-time grilling, not a substitute for staying close.

Step 1: Check the Grill Before You Light It
A new grill often ships with tape, plastic film, zip ties, or small packing pieces tucked under the grates, around the burners, or inside the firebox. Take everything out, and peel any protective film off stainless panels before the grill gets hot.
Before you light anything:
- Open the lid and confirm the cooking grates are seated flat
- Check that the propane tank valve is fully closed and the hose connection is snug (soap-water test for leaks)
- Remove any grill cover or packing material
- Place your gas grill at least 10 feet from buildings or combustible materials
Also look under the grates: the heat shields or flame tamers should sit in their slots over the burners, and the drip tray should slide all the way in. Your owner's manual lists the minimum clearances for your model, and those take priority over any general rule.
Step 2: Connect the Propane Tank and Check for Leaks
Connecting a tank is the step most first-timers worry about, and it's simple once you've done it once. Follow the connection page in your manual; the general sequence looks like this:
- Turn every burner knob to OFF, including any side or sear burner, and make sure the tank valve is closed.
- Set the tank upright in the holder or position your manual shows, never on its side.
- Check the connection. Remove the cap from the tank valve and look at the regulator fitting. If a seal looks cracked, torn, or missing, don't connect that tank.
- Thread the regulator onto the tank valve clockwise by hand until it stops. Don't use a wrench unless your manual says to.
- Leak-test the connection. Brush soapy water over the tank-to-regulator joint and the hose fittings, then open the tank valve slowly. Growing bubbles mean gas is escaping: close the valve and don't light the grill.
Open the valve slowly every time. Opening it fast can trip the regulator's safety device and leave you with weak, low flames on the first light. Our step-by-step gas leak test for your grill shows exactly which joints to check and how to read the bubbles, and it's worth repeating every time you swap tanks. If you're still choosing a cylinder, our propane tank guide covers sizes, fittings, and how to tell how much fuel is left.
Never check for leaks with a flame. If you smell gas or hear it hissing, don't press the igniter. Close the tank valve if you can do it safely, move everyone away, and call the fire department from a safe spot if the smell doesn't go away.
Step 3: Burn Off a New Grill and Season the Grates
A brand-new grill can carry light oils and residue from manufacturing and shipping. Before the first real cook, light the burners (Step 4 below), close the lid, and run the grill on high for the burn-off time in your manual, or until any smoke and new-parts smell fade. A little smoke the first time is normal. Heavy smoke, flames outside the cooking area, or a gas smell are not: turn the grill off and find out why before you continue.
After the burn-off, turn the burners down, fold a paper towel, dip it in a high-heat oil such as canola or avocado, and wipe a thin coat across the grates with long tongs. Porcelain-enameled cast-iron grates only need a light film; your manual's care section covers your grate material. Never spray aerosol oil over a lit grill.
Step 4: How to Light a Gas Grill
Lighting a Monument Grills propane gas grill:
- Open the lid—never light with it closed
- Turn the tank valve counterclockwise to open
- Set one main burner knob to "High"
- Press the electronic ignition until the burner catches
If it doesn't light, turn off the gas, wait five minutes for any gas to clear the air, then start over.
Once the first burner is lit, light the remaining burners one at a time the way your manual describes. Many gas grills use a push-and-turn knob for ignition; your manual shows the exact motion for your model and what to do if the igniter ever fails.
If the burner won't light
Don't keep clicking with the gas flowing. If a burner hasn't caught within about 5 seconds, turn the knob off, close the tank valve, and wait the full five minutes before you try again. Then narrow it down:
- Clicking but no flame: usually no gas reaching the burner. Check that the tank has fuel, the valve is open, and the regulator is fully threaded on.
- No click at all: usually the igniter battery or a loose igniter wire. Check it with the gas off.
- Lights, but every flame stays small: often the regulator's safety device has tripped. A slow valve opening and the reset in your manual usually fix it.
Our gas grill troubleshooting guide walks through each of these checks, including the regulator reset. If a burner blows out while you're cooking, treat it the same way: knobs off, tank off, wait, and relight with the lid open.
Step 5: Preheat the Gas Grill
Preheating: Close the lid, set all main burners to medium-high, and preheat your gas grill for about 15 minutes before cooking. The built-in dome thermometer should read around 450–500°F, though grate temperature will sit a bit lower. Clean grill grates before cooking for better results—a quick scrape with a grill brush once they're hot does the job.
Keep the lid shut while you preheat; every peek lets heat out. On a cold or windy day the grill can take longer to come up to temperature, so go by the thermometer rather than the clock. Your manual lists the preheat guidance for your model.
Step 6: Set Up Direct and Indirect Heat Zones
Mastering direct vs indirect heat is the single most important grilling skill, regardless of what brand is sitting on your patio.
Direct heat means food placed right over lit burners. Use it for anything that cooks in under 15 minutes: burgers, hot dogs, shrimp, thin steaks, onions, and quick veggies. Keeping the lid down helps maintain heat and ensures even cooking.
Indirect heat means food sitting over an unlit or low burner while other burners supply the heat. It works like an oven and is meant for thicker cuts—bone-in chicken, pork shoulder, tri-tip, or a whole spatchcocked bird.
Two-zone setup on a 3-burner Monument Grills gas grill: Light only the left and center burners on medium. Leave the right burner off. That unlit area is your indirect zone. This simple plan covers nearly every recipe you'll attempt in your first season.
To change the temperature, turn the knobs a little at a time, close the lid, and give the grill a few minutes to settle before you adjust again.
| Zone | Temp Range | Best For |
|---|---|---|
| Direct / sear | 400–500°F | Burgers, steak, veggies |
| Indirect / roast | 300–375°F | Chicken pieces, pork loin |
| Low and slow | 225–275°F | Ribs, pulled pork |
Use the lid thermometer as a guide. The temperature at the grate can differ, so check the food itself with an instant-read thermometer.
Control flare-ups by moving food to the cooler side of the grill if necessary. Many Monument Grills units include an infrared sear zone—sear a steak there for 90 seconds per side, then flip it to the other side to finish at indirect heat. That's the idea behind a reverse sear, just run in the opposite order.
Step 7: Cook Something Easy First
Your first cook: Season 4–6 oz burgers with salt and pepper, place them over direct medium-high heat, and close the lid. Cook 4–5 minutes per side. A meat thermometer inserted in the center should read 160°F. That's a complete beginner meal.
Practice cook: Sear chicken breasts 2–3 minutes per side over direct heat, then move them to the indirect zone until a meat thermometer inserted in the thickest part reads 165°F. Add a sprig of rosemary to the grates in the last minute for a grain of extra flavor.

Once those two cooks feel routine, the habits in our grilling tips for beginners, like prepping food indoors and flipping less, will make every cookout after that go more smoothly.
Step 8: Shut Down the Grill and Clean Up
How you turn the grill off matters as much as how you light it. Follow the shutdown order in your manual; for most propane grills it looks like this:
- Burn off what's left. After the food comes off, leave the burners on high with the lid closed for a few minutes, then brush the grates.
- Turn every burner knob to OFF, including the side or sear burner if you used it.
- Close the propane tank valve by turning it clockwise until it stops, and check that every flame is out.
- Let the grill cool completely before you empty the drip tray or put a cover on.
Before and after every cook: Preheat, then use a grill brush to remove residue from grates. Grill brushes clean grates effectively before cooking. After you're done, let the grill cool, empty the drip tray, and wipe exterior stainless-steel surfaces with a soft cloth and mild cleaner.
Essential Tools, Temperatures, and Food Safety
Accurate internal temperature readings matter more than any gadget. Digital thermometers provide accurate grill and food temperatures—use one every time, even on a premium Monument Grills gas grill.
Where to check: A meat thermometer inserted into the thickest part of the cut, avoiding bone and large fat pockets.
Safe internal temperatures (per USDA guidelines):
- Beef/pork steaks and roasts: 145°F with a 3-minute rest
- Ground beef: 160°F
- All poultry: 165°F
- Fish: 145°F
Use a meat thermometer to check for 145°F doneness on steaks—then let steaks rest for 3 minutes after grilling before you slice. Speaking of accuracy, run an ice-water test periodically: submerge the probe tip and confirm it reads close to 32°F (adjust expectations at altitude).
Tool checklist: long-handled tongs, sturdy spatula, heat-resistant grilling gloves that protect hands from burns, grill brush or scraper, oil in a small bowl with a folded paper towel, and a clean tray dedicated to cooked food only. Oil the food instead of the grates to minimize flare-ups and smoke.
Food safety reminders: Never place cooked meat back on the raw-meat plate. Keep perishable food inside until you're ready to cook. Refrigerate leftovers within two hours—one hour if it's over 90°F outside. These aren't just tips; they're the end of preventable foodborne illness.
Some Monument Grills smart models include built-in probe monitoring and integrate with the Monument Grills Smart App so you can track doneness from your phone without lifting the lid.
Understanding Your Gas Grill vs. a Charcoal Grill
A gas grill lights instantly and gives you knob-by-knob temperature control. A charcoal grill—whether a kettle or barrel—delivers more smoke flavor but takes longer to set up and demands more attention. For weeknight cooking, gas wins on convenience.
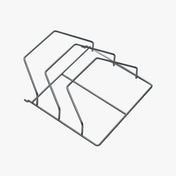
Core components of a Monument Grills gas grill: main burners (3–4 on most models), flame tamers or flavorizer bars, porcelain-enameled cast-iron grates, warming rack, drip tray, and optional infrared sear burner or side burner.
Fuel types: Propane is stored in portable 20-lb tanks you swap or refill—common in U.S. backyards. Natural gas is delivered through pipelines and requires a compatible Monument Grills model plus professional installation. Natural gas burns cleaner than propane and is typically cheaper, but propane produces more heat per unit, which matters for searing. Either fuel eliminates the ash cleanup you'd get with briquettes or lump charcoal.
Where charcoal still shines: A charcoal chimney helps ignite coals in about 15 minutes and delivers more pronounced smoke flavor. A two-zone charcoal setup allows for direct and indirect cooking just like gas, but controlling temperature means adjusting air vents rather than turning a knob. If your friends or family recommend a charcoal grill for that reason, they're not wrong—it's a different cooking method, not a better one.
Bridging the gap: A stainless steel smoker box enhances flavor by adding wood smoke to a gas grill. Throw a handful of wood chips into the box, place it over a lit burner, and you create smoke without switching fuel types. For low and slow smoking on gas, preheat your gas grill to 250–275°F and use a water pan below the grill grates to stabilize temperature and add moisture. Place wood chips on unlit burners for longer smoke production.
Caring for Your Gas Grill and Planning Your Next Upgrade
A bit of regular care keeps a gas grill safe, efficient, and under warranty. With an investment grill like those from Monument Grills, it's worth the time, and following a cleaning and maintenance routine will help it perform like new.
Seasonal inspection: At the start of each season, inspect grill parts regularly to ensure proper function—check for clogged burner ports, rusted flame tamers, cracked hoses, and loose connections, and order gas grill replacement parts if anything looks worn or damaged. Replace old fuel for better flavor and performance; a long-sitting tank can deliver inconsistent pressure.
Checking propane level: Pour warm water down the side of the tank and feel where the metal temperature changes—that line marks remaining fuel. Or weigh the tank against the tare weight stamped on the collar. When you plan to grill for a crowd, hang onto a spare tank so you don't run out mid-cookout.
Upgrades to consider: More burners create larger cooking zones. Side burners let you warm sauces or char peppers without leaving the grill area. Smart connectivity helps you learn your grill's behavior over time. Browsing Monument gas grills and accessories can give you a sense of which features match how you like to cook. These aren't meant as hype—they're options that open up new recipes as your skills grow.
For anyone coming from a charcoal grill, expect less ash cleanup and no chimney starter to manage, but pay closer attention to keeping burners clear and drip trays empty to avoid flare-ups and grease fires.
One last recommendation: Keep a grill notebook or phone notes. Record burner settings, cook times, and internal temps for every cut. Over time, you'll build a personal reference that makes each cookout faster and more fun—whether you're grilling for yourself or feeding the whole family.
Using a Gas Grill for the First Time: Common Questions
How do you use a gas grill for the first time?
Remove all packing material, connect the propane tank with every burner knob off, and leak-test the connection with soapy water. Light the burners with the lid open, run the grill on high to burn off the new parts, and wipe the grates with a thin coat of oil. Then preheat for about 15 minutes with the lid closed and start with something easy, like 4–6 oz burgers cooked to 160°F.
Do you need to burn off a new gas grill before cooking?
Yes. Run the new grill on high with the lid closed for the burn-off time in your manual, or until any smoke and new-parts smell fade. That clears oils and residue from manufacturing and shipping before food touches the grates.
How long should you preheat a gas grill?
About 15 minutes with the lid closed and the main burners on medium-high. The dome thermometer should read around 450–500°F; the grates run a little cooler. Cold or windy weather can add time, and your manual has the preheat guidance for your model.
Should the lid be open or closed when you light a gas grill?
Open, every time. Lighting with the lid closed lets gas collect under it. Close the lid only after the burners are lit, to preheat.
Why won't my new gas grill light?
On a first light, the usual causes are a tank valve that isn't open, a regulator that isn't fully threaded onto the tank, or a valve opened too fast, which can trip the regulator's safety device. If the igniter doesn't click at all, check its battery. After each failed attempt, turn the knob and tank off and wait five minutes before trying again.
How do you turn off a propane grill?
Turn every burner knob to OFF, close the propane tank valve clockwise until it stops, and check that all flames are out. Follow the order in your manual if it gives one, and let the grill cool before you clean it or cover it.
Can you use a gas grill in a garage or on an enclosed porch?
No. Use a gas grill outdoors only, away from the house, deck railings, and overhanging branches, and keep it out of garages, enclosed porches, and other covered spaces where gas or smoke can build up.




Join the conversation
Share Your Thoughts
Have a question, a variation, or a result worth sharing? Add it to the conversation.